If a well is drilled in the area, it is worth setting up an autonomous water supply system. But the organization of private water intake in a standard way with the installation of a caisson is a very expensive undertaking. It is not necessary to spend substantial sums on this overall structure.
We will show you how to complete a well without a caisson. For you, we have provided step-by-step technologies, described in detail the methods and nuances of implementation. For a clear perception of information and a clear understanding of work processes, we supplemented the material with photo and video instructions.
Construction of the pit: pros and cons
If it is not possible to spend impressive funds on the construction of the caisson, the problem is solved in two ways: a pit is constructed and equipped, or a downhole adapter is installed.
The simplest solution from the point of view of installation is a pit.

The pit is a recess dug around the wellhead, inside of which shutoff valves of an autonomous water supply system are installed
It is a simplified analogue of the caisson, which simultaneously performs several functions:
- protects installed equipment from the cold;
- protects the wellhead from atmospheric precipitation and domestic waste;
- acts as a structure inside which it is convenient to place a set of mechanisms that ensure the smooth operation of the pump.
Due to the lack of tightness of the structure, the pit is not suitable for areas with close to the surface occurrence of groundwater. When marking their mirrors at a depth of more than 5 m, the construction of the pit is a completely profitable and justifiable solution.

A pit is most often constructed of concrete rings or bricks, inside it is lined with insulating material, and on top it is covered with a hatch or concrete slab
The only design flaw is the lack of tightness. The joints between the concrete rings and the brickwork can pass the overhead pipe and precipitation and domestic waste. For this reason, it is not recommended to install a hydraulic tank and an automation system in the pit.
DIY pit construction
Earthwork is preferably carried out in the offseason. During this period, the cooled moist soil has a denser structure and therefore does not crumble.
Digging a pit under a pit
For the construction of the pit, a pit is excavated with a depth of 1.5-2 meters. Its dimensions should be 30-40 cm larger than the internal section of the structure under construction. The bottom of the pit is leveled and carefully tamped. To protect the walls of the pit from water, they should be temporarily overlaid with a film.
The most popular and simple in execution are pits of a rectangular and round shape.

The volume and overall dimensions of the pit are determined on the basis of the fact that the elements of the system can be freely placed and that they can be freely accessed
Is it necessary to concrete the bottom of the pit - a moot point. On the one hand, a monolithic “floor” is convenient for repair work and well maintenance.
It will exclude the penetration of flood waters into the annulus if the structure is flooded during the off-season. However, soil shifts occurring due to periodic freezing and thawing can significantly damage and warp it.
The best way to equip the bottom of the pit is to build a “pillow” of crushed stone and sand 10-15 cm thick. Clay can be used as a waterproof layer. The fossa resulting from shrinkage of the soil will only need to be periodically aligned.
The construction of the walls of the structure
The walls of the pit can be built using concrete rings for wells or broken brick remaining after dismantling a building. To build the walls of the desired thickness, the brick is laid in one layer.
If desired, the walls of the structure can be made concrete. To do this, formwork is put together from old unedged boards at a distance of 7-10 cm from the walls of the foundation pit. And then the formwork cavity is poured with concrete mortar.

In the process of erecting the walls of the pit, do not forget to leave a sufficient number of openings that will be needed for cable and water supply
After 5-7 days, when the solution acquires the necessary strength, the pit is blocked with wooden beams or boards.
To reduce the likelihood of erosion of the walls of the pit with flood water, they are covered with a layer of gravel on the outside. On the inside, the structure is better laid out with a layer of insulation, for example, sheets of extruded polystyrene foam.
The head of the pit can be covered to choose from:
- concrete cover;
- metal hatch;
- wooden board reinforced with wooden boards.
The lid of the pit is removable so that it is possible to carry out a routine inspection at any time or to carry out repair work. For example: dismantle the pipe or lift the pump.
Priyamok - in fact, is a home-made caisson. Simple methods for its arrangement are described in the article - How to make a caisson for a well with your own hands: device options and methods for their implementation
Wellhead completion
If it is not planned to deepen the wellhead into the ground, it is equipped by installing a wellhead. It will protect water from dust and dirt, as well as from the penetration of insects and rodents into the trunk.
The disadvantages of an open arrangement scheme include the inability to place additional equipment near the mouth and the lack of protection against vandal attacks.
Image Gallery
Photo from
Accessories for the arrangement of wells
Wellhead assembly
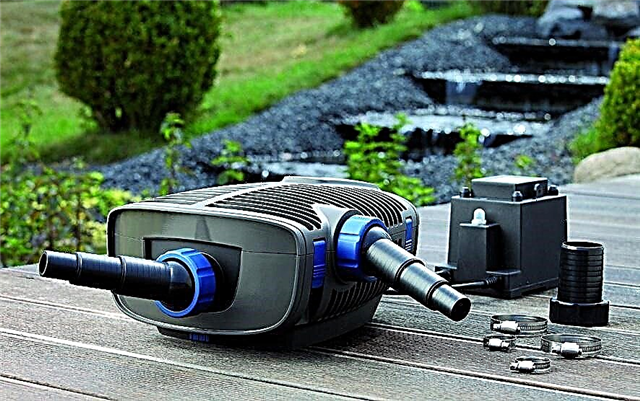
Submersible well pumps
Connecting the well to the water supply
The device and the principle of operation of the adapter
The second inexpensive way to equip the well involves the use of a special device - an adapter. In this case, the output of the water pipes is through the casing.

The main purpose of the downhole adapter is to connect the downhole pump to the underground part of the water supply leading to the house, laid below the freezing level
This arrangement method is excellent for irregular use of the well, which involves “freezing” the structure for several months, and for continuous year-round water intake.
The adapter is installed on all types of casing pipes made of polymer or steel alloy. Pipes must have sufficient strength, since they are designed to support the weight of the submersible pump and the communications connected to it.
The adapter is a device consisting of two body parts fastened together by a quick-disconnect screwless connection. The main task that is solved by installing this device is to protect the external branch of the water supply system from freezing.
Thanks to its use, the pipeline from the well can be laid below the horizon of seasonal freezing of soils.

The main purpose of the downhole adapter is to connect the downhole pump to the underground part of the water supply leading to the house, laid below the freezing level
The main elements of the adapter are:
- Fixed element. It is a threaded pipe. It is fixed on the casing below the freezing level through a specially made hole. Forms a sealed unit for the exit of the pipeline supplying water to the house.
- Reciprocal removable element. Outwardly resembles a tee with one blank wall.On one side it is mounted on a water intake pipe leading to a deep pump. The second is connected to the stationary element of the adapter. It is equipped with a connecting technical thread, which is necessary for tight joining of both parts of the adapter.
In the process of pumping out of the well, the water first rises up the column, then moves to the adapter, through which it is redirected and enters the pipeline leading to the house. With a partial separation of the elements, the water begins to simply merge into the well.

The use of the adapter in the arrangement of the well allows for stable water supply of a country house throughout the year (+)
Downhole adapters are made of bronze, brass, stainless steel. A wide assortment of products on the market includes products made from combined metal alloys.
Advantages and disadvantages of using the device
A well without a caisson device equipped with an adapter has a number of undeniable advantages.
Among the main advantages of this type of arrangement it is worth highlighting:
- Cost saving. The cost of the device is many times lower than the price of caisson equipment. And the costs of installing and connecting it are minimal.
- Easy installation and maintenance. The installation of the fixture does not imply complicated stages of work using the same welding equipment. Even a master who owns only the basic skills of repair work can perform it.
- Universality of application. The device is used for tapping a water pipe into all types of casing pipes. Due to the fact that the links of the device are tightly adjacent to each other, the maximum tightness of the structure is achieved.
The compact dimensions of the adapter allow it to be installed on the walls of the well so that it becomes almost invisible to outsiders. And this is especially true provided that theft is not so rare.

The adapter allows you to completely hide the connection point of the hydraulic structure to the water supply under the soil layer, without leaving the slightest hint of its presence
True source, equipped with an adapter, has several disadvantages.
These include:
- The complexity of the repair. To perform repair operations or routine inspection, you will first have to dig out the adapter connection point, which is not always possible.
- Power limitations. Although manufacturers declare the device’s ability to withstand large pressure drops, when arranging a well using an adapter, pump units with high performance should not be chosen.
In comparison with the arrangement of the pit, the adapter installation loses in that the accumulator, cranes and automation system will have to be taken out to a separate room.
In addition, if the elements are incorrectly connected during the operation of the hydraulic structure, it is quite problematic to control the reverse flow into the groundwater production trunk.
Depressurization of elements can occur even if the connecting elements of the structure are made of dissimilar metals, which have different aging wear and react differently to the effects of temperature and moisture.
Adapter installation technology
When choosing an adapter for a well, compare the size of the device with the diameter of the casing and the size of the submersible pump, if it is planned for operation.
To perform the work, the following materials will be required:
- downhole adapter;
- crown milling cutter;
- puller;
- connecting fittings;
- metal stakes.
When calculating the dimensions of the device, be aware that it should protrude approximately 1-3 cm from the inside of the casing.

By giving preference to products made of stainless steel, bronze and “food” alloys, you will protect yourself from premature incapacitation of the device
Use a neutral, water-repellent grease to handle structural elements before digging in.
From the tools should be prepared:
- bayonet shovel;
- bucket for excavation;
- adjustable wrench;
- mounting pipe;
- Fum tape.
The mounting key can be made with your own hands from a metal or plastic pipe cut of a suitable diameter with a thread. As a result, it will take the form of a T-shaped structure, a length equal to the installation depth of the device plus a half meter-meter for ease of installation.
The thread is needed in order to be able to wind the counterpart of the adapter onto it. The opposite end is equipped with a tee, simplifying the process of twisting the device after fixing the mounted part of the device.
Earthworks
To lay the pipeline, dig a trench from the well to the point of entry of the system into the house. The depth of the trench is 30-40 cm below the level of seasonal freezing. They are needed to form a compacted sand cushion of about 20 cm and to exclude the possibility of accidental freezing of the pipeline.
For mid-latitudes, the level of seasonal freezing of soil is estimated at 1.2-1.8 m, depending on the type of soil.
When digging a trench, it should be noted that the pipeline must be laid with a slope from the house to the hydraulic structure in case of draining the water from the system before conservation. The slope should be 3 cm per meter.
That is, we are looking for the depth of the adapter connection point by adding the freezing level, 30-40 cm by the pillow device and multiplied by 3 lengths of the external water supply branch.
With a distance of 10 m from the house to the well, the calculation will look something like this: 1.5 m + 0.4 m + 0.3 m.

If you plan to hide the head of the well in the depth of the soil at the stage of excavation, it is necessary to shorten the height of the casing
Near the well, the trench needs to be expanded and dug up in the form of a pit, the dimensions of which are determined from the calculation of the convenience of placing the adapter installer in it. A half-meter-wide pit is enough to carry out work on inserting the device.
Equipping a well with a pitless adapter
Installation of equipment is carried out in two stages. First install the main part of the device. To do this, a hole is drilled at the casing depth using a crown cutter on the casing. The diameter of the hole can be 1ʺ, 1 1/4or 2. The main thing is that it matches the size of the adapter.
The stationary part of the device is introduced into the hole drilled in the casing and fixed with a union nut. Using a pipe wrench, tighten the nut all the way.
The rubber gasket-seal ensures the tightness of the structure at the joints, minimizing the likelihood of groundwater entering the well.

The threaded crown must match the size of the adapter. The sealing ring is preferably treated with silicone grease.
Before mounting the reciprocal part of the device, the pipe, electrical cable and cable are connected to the pump. The cable and power cable must be oriented so that they take up space on the opposite side of the adapter.
The water pipe is fixed by a threaded connection through a sleeve. In order to increase the tightness, the joint is sealed with FUM tape.
Since during the operation the vibration of the pump complete with the heaviness of the water-filled pipe will create significant loads, a brass sleeve should be used to connect the adapter to the water pipe.
The difficulty of mounting the reciprocal part of the device lies in the immersion and precise penetration of the stationary element into the thread. To ease your task, you can use the T-shaped mounting pipe.To speed up the process, some craftsmen additionally highlight a hole with a flashlight lowered on a rope.
The adapter parts are connected through the dovetail assembly. The reciprocal part of the device is fixed using a mounting pipe. After installation is complete, the mounting pipe is removed to the surface.
After the assembly of the system is completed, the pump is lowered to a predetermined depth, and the pipe end is cut off. This work is more convenient to do with a partner: the first immerses the pump, the second - holds the equipment and straightens the hose.

To remove the load from the adapter, which will certainly be created during the operation of the device, the safety cable of the pump is brought out and secured with pegs
At the final stage, it remains only to power up the equipment and check its performance.
During the subsequent operation of the structure, it is necessary to check the condition of the adapter gaskets once a season. Keep in mind that the outer gasket directly in contact with the ground becomes unusable in 2-3 seasons.
Docking elements can stick to each other over time. To prevent this phenomenon, it is necessary to periodically disassemble and lubricate them.
Additional information about the features of mounting and using the downhole adapter is presented in this article.
Which is better: downhole adapter or caisson?
Video tips for building a pit:
Option to equip the well by installing an adapter:
Each of the above methods has its advantages and disadvantages. Therefore, when choosing the best option, you should focus on the location of the hydraulic device and the type of equipment used to equip the system.
Have experience with a well without a caisson? Or have questions about the topic? Please share your opinion and leave comments in the form below.