The flawless connection of the hood in the kitchen to the ventilation will ensure a complete removal of the volatile substances that form during cooking. Not all of them are pleasant and useful, many are toxic and negatively affect the sense of smell. Believe me, there is nothing better than an exhaust device with their removal and no one will cope.
Those who wish to independently install and connect the hood, we suggest that you familiarize yourself with a very useful article. The information presented in it will help you to ideally select the necessary type of device and perfectly carry out installation work. Our information will be useful not only to independent craftsmen, but also to those who want to control hired workers.
The author of the article describes in detail the varieties of cooker hoods, mounting options for various designs. The process of connecting the exhaust device to ventilation is thoroughly disassembled. As an excellent informative addition to the text, photo selections and video instructions were used.
Varieties of exhaust devices
To improve the microclimate and rid the room of odors, soot and burning, a kitchen hood is used. Depending on the internal device, it can remove exhaust air, purify it, or alternately work in each of these two modes.
In the first case, the equipment evacuates the air masses from the room to the atmosphere. To do this, a special pipe is used - an air duct.

Models that draw exhaust air into the atmosphere are easy to use and maintain. They do not require the regular purchase of expensive filters.
Models of the second type are recirculation ones. For their full functioning, inclusion in the ventilation system is not required.
They need power to draw in exhaust air that builds up, for example, over a frying pan that fries potatoes. Particles of fat, soot and the smell of cooking food get inside the device.
The fat filter is the first to take the blow, then the coal line comes. It is he who absorbs all impurities and gives out purified air back to the room, releasing it through the small openings available in the housing.

A variant of kitchen equipment that does not require inclusion in the ventilation system is distinguished by great demands - for the functioning of the equipment it will be necessary to periodically buy filtering devices, usually coal
The third type is combined models. They can work both in the mode of removal, and cleaning. In the first case, to ensure the operation of the kitchen hood, it will need to be connected to the ventilation. And in the second - the installation of a cleaning filter.
Choose the right option to be used. Moreover, depending on the model of the device, its settings may differ.
For example, for hoods with a cleaning mode from LEX, the manufacturer recommends installing carbon filters first. Then take the plugs that come with the exhaust equipment and close the side and top holes, which are designed to be connected to the ventilation system.

The plugs allow you to prevent uncontrolled airflow from inside the device - first it is fully filtered, and only then it will come out through openings designed for these purposes
In addition to the principle of operation, the hoods differ in the installation option - they are built-in and open.
And yet they all differ in form, on which the possible location of the exhaust equipment depends.
Image Gallery
Photo from
Wall-mounted exhaust design
Wall-mounted recessed view
Corner Dome Hood
Kitchen appliances are notable for their price, which depends on the brand awareness, the sophistication of the design idea, the materials used in the production and the functionality of the exhaust equipment.
The consumer can easily choose a hood in the right price category - even in the low-cost segment there are many worthy models. True, the more complex the device can perform processes, the more expensive the final cost will be.
Subtleties of connecting the hood
The correct option for arranging all communications is the stage of building a house or overhauling an apartment. True, in the second case, you will have to put up with the finished project, making possible adjustments.

When constructing ventilation ducts on your own, you can not connect the pipeline from the bath, toilet and kitchen into one
To connect the hood to the ventilation also use 2 options:
- connection to an existing wenshacht hole;
- conducting a pipeline for the movement of air through the wall on which the installation of equipment is planned.
In the first case, you have to spend money on buying air ducts, sometimes it is not just one meter of material. And in the second, you will need to make a through hole in the kitchen wall, which will go out onto the street.
Image Gallery
Photo from
Air outlet through wall
Air outlet through ceiling
Duct across the room
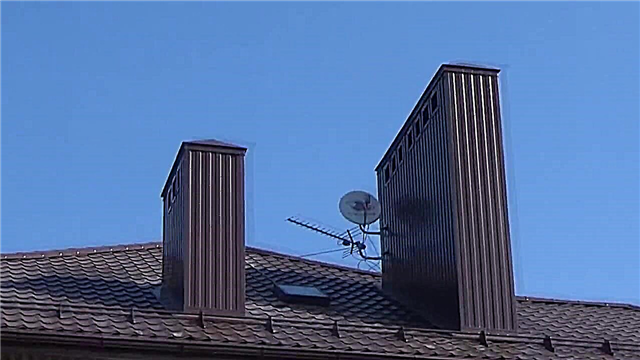
For private houses / cottages, the arrangement of vencanals with their withdrawal to the roof is characteristic. It is important in this case to properly organize the system of receipt and evacuation of air masses.
Work Guide
Those who decide to connect the hood themselves will first have to study the recommendations set out in the instructions for the model, and clearly implement them. Then carefully inspect the equipment and purchase, if necessary, the missing parts. You may need an air duct, clamps, adapters, sealant, or metal tape.
Step # 1: Preparing the room and place
It is necessary to prepare the room for future work, select tools, acquire the necessary materials. It’s good when the ventilation hole is already there. Otherwise, start with doing it.

It is convenient even at the construction stage to plan the location of kitchen appliances, and leave bends for connecting appliances to ventilation. For example, when there is an island hood in the room, the duct goes right in the middle of the ceiling
If the house or apartment has a living condition and a full-scale repair is not planned, then you can make the missing holes by drilling it in the ceiling / wall. It depends on the specific situation and the wishes of the owner.
The preparation of the premises will consist of several stages.
Image Gallery
Photo from
Step 1: Preparing the site for work
Step 2: Measure and Mark
Step 3: Drilling a new vent hole
Step 4: Installing the hole outside
When the hole is formed, it is time to install the exhaust technology over the stove. The method will depend on the model and location of the latter. It is important to securely fix it with the fasteners included in the kit.
Sometimes in the case there are not enough holes for fixing the product. Then you can do them yourself in the right places and screw the screws.
Step # 2: the process of connecting to the ventilation
When the hood is installed in accordance with the manufacturer's recommendations, the turn has come to connect it. Here it should be understood that for the operation of the device, a channel for exhausting air masses and a stable power supply are needed.

If you decide to use plastic pipes, then you have to buy adapters, sealant, you may need to switch from a round exhaust hood to a rectangular future channel. It is important that the diameter of the duct is not smaller than the outlet pipe of the device
The first step is to connect the device with ventilation. This can be done using the following pipe types:
- metal corrugation - aluminum, less often steel;
- corrugated plastic - extremely rarely used;
- stainless steel round section;
- plastic with a rectangular or circular cross section is also a fairly popular and convenient option.
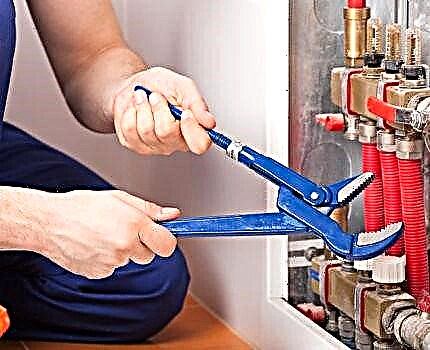
When choosing a corrugation, you will need a clamp, metal tape, possibly a grill for arranging the entrance to the common house channel. The connection is phased.
Image Gallery
Photo from
Step 1 - Assembly from the design
Step 2 - Installation and Fixing
Step 3 - Connecting the Corrugated Duct
Step 4 - The second end of the pipe joins the hood
High-quality performance of all connections will ensure excellent operation of the device. But the work did not end there - you still cannot use the hood. It remains to start her engine, applying power to electricity, and put on a decorative casing.
To do this, you must comply with a certain order in the performance of work. First you need to make sure that the line to which the connection will be disconnected.
Image Gallery
Photo from
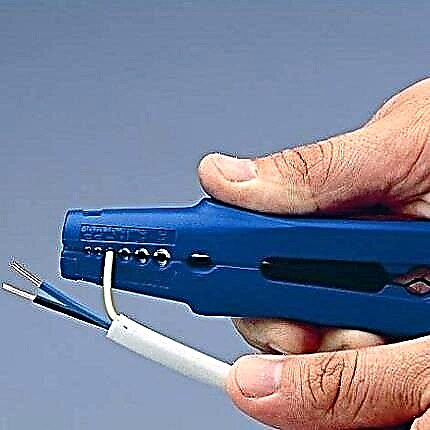
If the hood has wires, they will have to be connected to the power cable, clearly following the diagram on the housing next to them. For this, it is convenient to use PPE caps
If this model of equipment is equipped with a plug, it is enough to insert it into a socket located nearby. It is good when an electric point is prudently installed for the hood, which is located directly behind the duct
Now it remains to measure the length that the protective box should have and fit it, hiding the rest. Boxes, as a rule, allow this to be done by pushing the unnecessary inside
Electric wires, an air duct, all fasteners are hidden behind the box - on the outside, the hood housing and the path to the entrance to the channel look like a single whole
Electrical connection of the hood
Adjustment of the size of the protective box
Having completed the connection, it remains to check the build quality. For this, the equipment is immediately turned on and all the operating speeds are selected in turn.
Turn on the backlight and measure the noise level produced by the device. It is checked against the indicators specified in the instructions.
Step # 3: Completing the installation
Not always connecting to ventilation and to the mains is the final stage. Sometimes the entrance to the mine is extremely uncomfortable or very far away and you have to turn on your imagination in order to somehow disguise it.
Image Gallery
Photo from
Long exhaust pipe
Duct hidden in the closet
Ventkanal behind a decorative casing
Beautiful plastic pipe
Ventilation duct behind a false ceiling
Layered plasterboard ceiling
Rectangular duct
Island hood in the middle of the room
It is important to plan which option to mask the duct to use in your kitchen. Indeed, the implementation of some ideas will require additional costs.
The easiest and cheapest option when the hole is near - the hood of the exhaust device will hide the insertion point into the ventilation system. It’s not bad, when it’s very close to the mine entrance - you have to buy a minimum of material - for example, a plastic pipe that harmonizes with the color of the rest of the kitchen furniture.
Standards of Use and Care
Terms of use and timely service are the key to the longevity of kitchen appliances. It is not surprising that devices with a guaranteed service life of 1-3 years, subject to certain rules, will quietly work for 8-10 years without requiring expensive repairs.
Safe use of the device
In order for the hood in the kitchen to function without problems, you should initially properly install it and connect it to the communications - power and ventilation. There should not be any distortions.
When the test is turned on, the device will work quietly, emitting an acceptable noise level. Creaking, crackling and other extraneous sounds are witnesses of errors made during installation.

Immediately after installing the equipment, you should check the performance and noise. You can use a real device for measuring noise level, if any, or an application with the same name, downloading it to a smartphone
It is strictly forbidden to use a household exhaust device in production - only for its intended purpose. Otherwise, the owner loses the warranty.
In addition, the following actions are prohibited:
- close or clog openings on the product body;
- restrict or completely block the free flow of air during operation of the device;
- connect the duct to the channel to remove smoke and other hot emissions;
- carry out repair or maintenance manipulations without disconnecting the hood from the mains.
Such prohibitions are associated with the safety of users and the technology itself - a violation of the rules will entail the failure of the fan, without which the device will not be able to function.

When the final stage of cooking is flambe, for example, a mouth-watering steak to convey the subtle notes of aged cognac, the process should be carried out very carefully to avoid ignition of the grease filters
DIY service
Service work depends on the frequency of use of the hood, the nature of the dishes being built and the mode chosen for its operation. It is important to remember that maintenance is carried out when the device is completely disconnected from the mains.
Care of the product consists in washing the grease filters monthly - you need to remove them and remove traces of soot and dust with a soapy solution and a soft sponge. Leave to dry at room temperature.

Ignoring the rules for cleaning grease traps can lead to accidental fire of the latter and damage to the exhaust equipment. Moreover, dirty filters can cause poor performance.
In the presence and use of the recirculation mode, carbon filters will have to be changed. This is done on average every 4-6 months. The frequency completely depends on the model of the device and the recommendations of its manufacturer.
If the installed equipment is only capable of evacuating the exhaust air from the room, then there will be no need for additional expenses for the purchase of filtering devices.
In addition, the device needs to regularly remove contaminants from the surface of the case - with a soft rag soaked in soapy water, it is necessary to wipe the stains formed during operation.
The same procedure should be repeated on all parts of the device inside the device and which can be reached. Particular attention should be paid to cleaning the fan blades - an excessive amount of waste accumulated on them leads to a decrease in the exhaust power.

You can remove any dirt using any dishwashing detergent. The main thing is that it does not contain rough inclusions that can scratch the surface of the filter or the body of kitchen appliances
When the bulbs burn out, they will have to be replaced with new ones, choosing the same power and size. If some mechanism breaks down, then it is better to seek help from a service center without trying to fix the problem on your own.
About the installation of exhaust equipment and its connection to the ventilation system in the video:
The conclusion of the duct of kitchen equipment to the street in a private house in the video:
Having familiarized yourself with the rules of the work when connecting the exhaust equipment to the ventilation system, you can try to do everything on your own.
An exception is the recommendations of the manufacturer of the hood, advising the installation and supply of communications, with the involvement of authorized specialists.In this case, in order not to lose the guarantee for expensive equipment, you will have to pay for the installation and connection of the device.