The times when there were no basic conveniences in a private house are long gone. A summer cottage and a rural cottage should please their owners with comfort. A well-thought-out sewage system in a country house is a task that, with a competent approach, anyone, even a novice master, can realize.
Before proceeding with the development of the project, it is necessary to familiarize yourself with possible options for organizing an autonomous system, choose the type of treatment plant, and study the intricacies of installing internal and external sewer networks. Answers to all identified questions are detailed in the article.
General design principles
Ideally, a sewage system should be laid at the design stage of the building. But the arrangement of the bathroom, which can provide an urban level of comfort, can be fully organized in the old building.
Well, if it is possible to connect communications to a centralized village or city highway. For lack of such, the task will have to be solved by creating an autonomous sewage system.

The main stages of work in both cases when laying communications inside the building will be identical; the difference is only in the organization of drainage outside the building
The autonomous sewage system includes two interdependent parts of the system:
- House system. Its constituent components are water receivers and pipelines. If this is a two- or three-story house, then the system includes a vertical riser with horizontally laid pipes connected to it by means of fittings, which are connected to plumbing fixtures.
- Outdoor system. It is presented horizontally laid under a certain slope of the pipeline. It receives effluents from house pipes and takes them to an autonomous treatment plant or to a centralized highway.
When arranging the sewage system in a house under construction, the installation of bathrooms and kitchens should be designed in one part of the building, placing them closer to the wall, where the sewage system faces the street.

When designing the drainage in a two-story building, to simplify installation and reduce the number of risers, place the bathrooms over each other (+)
There are two ways to dispose of wastewater from the system: pressureless and pressure. The first option is simpler to execute. But in this case, it is necessary to correctly calculate the angle of creation of the inclined plane of the pipes.
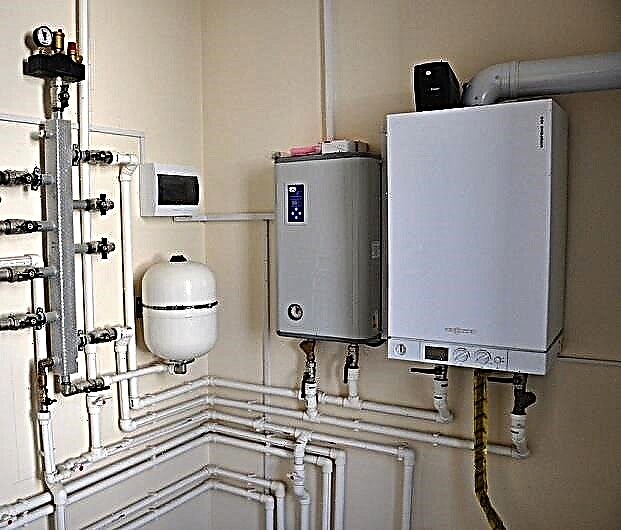
If it is planned to place several bathrooms in a house by installing a complex sewer system, a powerful sewage pump will be required to ensure uninterrupted operation. The installation of this unit will be relevant even if the site does not have any bias.
The main points to consider when planning an outdoor sewer:
- Plot landscape. To ensure unimpeded flow of waste fluid, a cesspool or septic tank should be located at the bottom of the site.
- Ground type and groundwater level. The choice of the type of treatment plant and the depth of the external pipeline depend on this parameter.
- Land area and location. It is necessary to provide access for repair activities and access to the sanitary equipment.
When designing an internal sewage system, it should be borne in mind that horizontal pipes from appliances to the riser should run at a slope.

According to the standards, pipes D 50 mm are inclined by 3 cm for each running meter; for pipes D 100-110 mm withstand a tilt angle of 2 cm per linear meter
On average, the length of the pipeline from the drain to the vertical riser is about 3 m. According to the standards, the farthest plumbing fixture can be 5 m from the riser. The distance of the connection point from the toilet to the riser is 1 m.
With the construction of an internal sewage system, you can cope with your own hands:
Image Gallery
Photo from
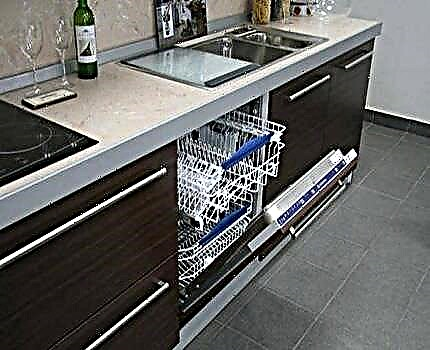
A drainage device paired with a water supply
Pipe system for connecting plumbing
The device of water sockets for water supply
Drywall pipe sewing
Filling sewer pipes with screed
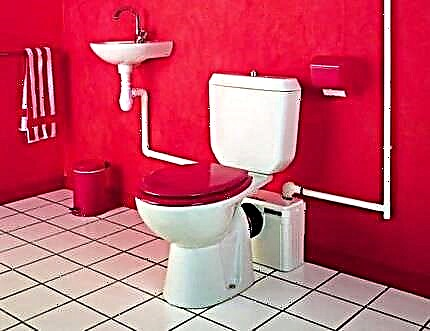
Connecting the toilet to the drain
The use of corrugated sewer pipe
Finishing the bathroom of a country house
Options for sewage treatment plants
When arranging an autonomous sewage system, when it is not possible to connect to a centralized highway, one of three types of structures can be:
- Cesspool - The most budgetary and easiest option to execute. It can be realized by creating a foundation pit, the bottom and walls of which are laid with concrete rings, stone or building bricks. The only "minus" of the design is the need for regular pumping of contents with a sewage machine.
- Septic tank - a more efficient construction, with the help of which it is possible not only to collect, but also to clean drains mechanically and biologically, making them suitable for technical purposes.
- Autonomous station - the best option, providing the highest possible degree of purification in a biological way, thanks to which water can be reused for technical needs. Due to the forced air supply, aerobic bacteria living inside the tank quickly and efficiently decompose organics.
A conventional cesspool does not meet environmental requirements, since it creates a risk of runoff entering the ground. Therefore, this option is chosen only for small country houses designed for seasonal living.
For year-round homes, it is better to install a multi-chamber septic tank or a local biological treatment station.
You can pick up a septic tank, or build it yourself. It happens one, two and three-chamber execution.
Image Gallery
Photo from
The choice of the type of treatment plant for an autonomous sewer system depends on the geological conditions of the site, the type and total amount of sewage received by it
The simplest design option for small families is a sealed concrete well from which drains are pumped out as they accumulate
The two-chamber septic tank is designed for a family of 3-5 people. The effluents discharged into it are partially settled, the treated wastewater is poured into the second chamber through an overflow pipe. From the second chamber, the bottom of which is folded by a soil filter, the effluents are disposed of in underlying rocks
The more wells in an autonomous septic system, the higher the wastewater treatment. In addition, multi-chamber structures are much less likely to require the pumping out of insoluble sediment. In three-chamber septic tanks there are two chambers with a sealed bottom, the third with a soil filter
The installation of septic tanks with cameras, instead of the standard bottom of which a soil filter is arranged, it is possible if the septic tank is installed in rocks with high filtration properties: sand, gravel, gravel. If the bottom of the treatment point is buried in sandy loam, clay, loam, then the discharge of purified water is impossible
If collection of purified water into the underlying soil is not possible, collectors or stations for deep biological treatment are installed to collect and treat effluents. From the first, the effluents are pumped out, from the second, they are dumped onto the relief, because stations purify water by 95-98%
A multi-chamber septic tank or a domestic sewage tank can be purchased ready-made. The design is delivered to the site and installed by construction equipment
It is more convenient and practical to fill the treatment plant for the treatment of domestic wastewater on the site by constructing formwork from the board for this. This is a long and laborious process, but significantly less reflected in the family budget.
Treatment facilities for a private house
Single chamber cesspool of concrete rings
Cesspool with overflow
Three-chamber septic tank made of concrete rings
Excavation pit for septic tank or storage device
Sealed plastic container - drive
Factory cast concrete septic tank
Self pouring concrete structure
Initially, the cleaning of the liquid inside the walls occurs due to delamination and precipitation. Then the destruction of the solid impurities present in it is carried out due to the activity of aerobic bacteria.
The owner's task is to remove sludge deposited on the walls of the well as it accumulates.

In any case, the first chamber of the structure should be a sealed drive, inside which settling of the liquid takes place, the second section for tertiary treatment may have perforated walls
The easiest option is to purchase a finished product made of heavy-duty polymer. You can make a septic tank yourself by pouring formwork with concrete or by erecting brick or masonry.
Want to simplify your task? Use 3-4 concrete rings, the cost of which is not high on the market.
The volume of the septic tank is calculated based on the fact that 200 liters of effluent are consumed per household. The capacity of the treatment plant should be not less than the total three-day volume of effluents.

To equip a treatment plant that does not need regular pumping of wastewater, it is recommended to install a filtration well with a septic tank
An important point! The use of a filtration well is only possible provided that the site has a low level of groundwater.
On clay soils and with high groundwater level it is better to place a biofilter or install an elevated filter cartridge.
Image Gallery
Photo from
Purified Water Absorption Well
Filtration field in areas with high GW
Post-treatment infiltrator system
Sewage disposal gutter
The main stages of the installation of internal sewage
In order to correctly calculate the required amount of materials and prevent installation errors, you should order a project.
Are you sure that you can perform the calculations yourself, taking into account the requirements of building codes, and at the same time want to save the cost item? Then limit yourself to mapping the sewage system.

The designed system of sewer pipes should be simplified as much as possible, because the free flow of the drain directly depends on it (+)
You can design the system in a computer program, or by doing all the calculations and drawings manually.
Selection of required materials
When arranging both external and internal sewerage, polyvinyl chloride or polypropylene pipes are most often used.

Polymer pipes are inexpensive, easy to transport and as simple as possible to install, because the assembly of the pipeline does not require the use of a welding machine
The diameter of the sewage pipes of the internal sewage system must be larger than the size of the installed drain pipes.
The cross section of the pipes used for the construction of the riser, provided that the toilet will be connected to it, should be 100 mm. The size of the fan pipe is similar to the diameter of the riser. The connection to the riser is made by pipes D 50 mm.
For the device of external communications it is convenient to use a corrugation. It ensures the reliability of the system during seasonal movements of the earth, but due to the presence of stiffening ribs, the corrugation is not subject to deformation.
In addition to pipes for arranging sewage, you will also need:
- knee of various configurations for the formation of angles;
- triple and quadruple fittings for branching the system;
- adapter couplings for joining elements of different diameters;
- inspection hatches for the possibility of cleaning the system in different areas;
- sets of rubber seals.
To cut pipes in size and create chamfers at their ends, you will need a “cutting” saw for plastic and a sharp knife. To handle joints, prepare sealant in advance.
Installation of vertical risers
Installation of the internal sewerage begins with the installation of vertical risers. They are laid from the basement to the roof, passing through the floors. Underwater pipes are connected to the installed riser via oblique tees.

In the lower part of the sewer risers passing through the floors, inspection hatches are mounted, through which later, if necessary, blockages can be eliminated
The riser with horizontal pipes connected to it is lowered to the level of the basement or basement. There, external pipes connected to it through a hole in the foundation are connected to it.
To minimize damage to the pipe under the influence of pressure by the walls of the building, a metal or concrete sleeve is installed in the place of its laying.
It should pass through the base of the building, protruding on both sides by 15 cm. The diameter of the sleeve should exceed the size of the outer sewer pipe.

If the outlet pipe is mounted in an unheated room, it must be insulated with fibrous materials or “shell” foam blanks
The insulation is laid in the cavity of the sleeve, filling the voids formed after laying the outlet pipe. It will reduce the chance of freezing and prevent loosening of the pipe inside the sleeve.
At the final stage, after connecting the floor-laid pipes to create a noise and waterproofing layer, the risers are closed with a screen of moisture-proof drywall and wrapped with cuts of rolled materials.
Installation and connection of plumbing
The first thing is to connect the toilet bowls, after which all the other appliances. In order to negate the likelihood of waste fluid getting into plumbing fixtures, it is best to connect them above the toilet. Several plumbing fixtures are allowed per branch.

The horizontal pipeline can be placed under the ceiling or laid externally, decorating a bit later with facing material
When laying the pipeline, if there is a need to turn the pipe 90 ° to reduce the pressure in the system and prevent the formation of blockages, the connection must be made as smooth as possible. For this purpose, 3 knees are installed, each with an angle of 30 ° or 2 knees with an angle of 45 °.
If it is not possible to create “soft corners”, it is recommended to place a tee equipped with a cover after a sharp bend. Through it, you can clean up possible blockages.
Tubes of smaller diameter are joined with larger elements by means of adapters.

Connect the pipes to the surface using clamps, and at the tie-in points in the riser and branch points by installing additional fasteners
Each plumbing fixture is connected to the sewer pipeline through a U-shaped siphon, the main purpose of which is to form a water seal. It will act as a barrier that prevents the spread of fetid odors from the sewer into the room.
Arrangement of sewer ventilation
Water masses drastically drained from the same toilet bowl, as they move through the pipe, form an area of discharged space.
If it is not possible to provide forced air into the system, then water flows from the siphons after the flows. As a result, unpleasant odors appear. The problem can only be solved by constructing ventilation.

To ensure ventilation of the system, the riser pipes are extended to the level of the roof, leaving the upper end open, but protected from precipitation (+)
For ventilation, you can also mount an aeration valve at the top of the riser. It will provide access to air flows, thereby preventing the discharge of air in the pipe.
Outdoor drainage
The arrangement of the external sewage system is also divided into two main stages: the construction of a treatment plant and the laying of the pipeline. When performing each of them, a number of points should be taken into account.
Photo-example of the construction of a sewer system
In order to get a visual representation of the construction process of the outer part of the autonomous sewage system, we suggest that you familiarize yourself with the stages of work presented in the photo:
Image Gallery
Photo from
For the full processing of sewage with subsequent disposal into the ground, we buy a sewer station
We select a place on the site for the location of the sewer station. We take into account the manufacturer's recommendations in this matter, usually the minimum distance from the foundation is 5 or more m
If necessary, we develop a route inside the house for laying a sewer pipe to the outlet of the drains of the internal system from the house
Trenches for laying sewer pipes both within the foundation and from the outside with a tambour and form a slope towards the drain to ensure free movement of waste material
To install a sewer station, we develop a pit, the depth of which takes into account the bottom leveling and pouring concrete slab if necessary
We remove the ground that collapsed during the development, level the bottom, tamper and fill the concrete slab with a capacity of 10 cm
At the outlet point of the sewer from the house, we drill a hole with a drilling machine, using a crown for drilling concrete
Upon completion of drilling, we remove the concrete core from the hole in which the sewer pipe will pass. We put a cotton insulation in it and put a sleeve that will provide free passage to the pipe and protect the thermal insulation from creasing
Stage 1: Purchase and delivery of a sewer station
Stage 2: Development of a trench to the installation site
Stage 3: Preparation of the route for the withdrawal of sewers into the street
Stage 4: Slope towards the drain
Stage 5: Development of the pit for the installation of the station
Stage 6: Leveling the bottom of the pit for the treatment plant
Stage 7: Drilling the foundation with a diamond core bit
Stage 8: Removing the core from the foundation of the house
The preparatory work has been successfully completed, now we proceed to the direct assembly of the system, to the installation and connection of the treatment plant, as well as to the arrangement of the site:
Image Gallery
Photo from
After a minimum of 14 days after filling the slab at the bottom of the pit, we install a sewer station on it. In areas with a high level of ground water we anchor equipment - we attach it to the stove with a cable
We lay the sewer pipe, starting from the exit from the house, advancing to the station. Laying is controlled by the level, if necessary, we adjust the slope. Next we carry the power cable in the corrugated pipe
We test the tightness and correct installation of the system by pouring a couple of buckets of water into the toilet. If everything is in order, we fill the trench with the pipe and cable with soil dumped during mining
In order to speed up the work, we’ll work on a partially filled trench with an excavator, which at the same time will level the area
We sew the sewer pipe in fact into the body of the sewer station. Pipe inlet is welded using a polymer cord, then carefully treated with sealant
Using a plastic elbow, we connect a ventilation pipe to the station, the upper edge of which should ultimately be above ground level
We install filters and modules with aerobic bacteria in the sewer station, which disinfect and maximize wastewater treatment
The foundation pit around the treatment plant is filled in layers with sand, gently tamping each layer of backfill. If the house has small children and animals, we arrange a fence around her hatch
Step 9: Install a sewer station in the pit
Step 10: Laying Sewerage and Power Cable
Stage 10: Filling the trench with laid communications
Stage 12: Excavator Leveling
Step 13: Connect the sewer pipe to the station
Step 14: Connect the vent pipe
Step 15: Installing Modules with Aerobic Bacteria
Stage 16: Arrangement of a site around the sewer station
Erection of a treatment plant
First of all, they dig a pit for installing a septic tank. The minimum distance between the residential building and the sewage treatment plant is 5 m, the maximum is 20 m. The most optimal option is 10 m.

If the site area is limited and the septic tank has to be located in close proximity to the source of drinking water, it is better to build a multi-stage cleaning system
Having decided on the location of the septic tank, they dig a pit 2.5-3 m deep. Its dimensions depend on the dimensions of the structure.
The size of the septic tank depends on how many households live in the cottage and how often they use plumbing. So, during the construction of a septic tank of concrete rings for a company of 4 people, it is enough to install a design of three rings with a size of 1 * 1.5 m.
If sewage is carried out in the country, where the family gathers from time to time, 2 rings D 1000 mm are enough.
The bottom of the pit is leveled and lined with a sandy “pillow”, making it 150-200 mm thick.

To create a reliable and tight base, the bottom of the pit is poured with cement mortar, forming a screed with a thickness of 150-200 mm
After 4-5 days, when the concrete gains the desired strength, the walls of the septic tank are erected, placing concrete rings on top of each other or laying bricks in rows. When installing the finished tank, it is important to ensure its reliable fixation by attaching to the concrete floor with cables.
An important point! From the edges of the pit to the walls of the tank there should be a distance of 100-150 mm. After the construction of the void, it will be necessary to fill it with clay mixed with broken brick.
The vent pipe is removed from the septic tank. According to the norms, its upper end should rise above the ground at a height of 80-100 cm. To protect against precipitation and small debris entering the ventilation, the upper end of the vertical outlet is equipped with a “mushroom”.

Using a puncher or grinder, make a hole in the upper part of the tank wall for installing the sewer pipe coming from the house
A concrete cover equipped with an opening for the hatch is “hoisted” on top of the septic tank.
The installation technology of the filtering well is not much different from the septic tank device. In order for the treated drains to be naturally absorbed into the soil without hindrance, the walls of the well can consist of concrete rings with perforation or are built using brickwork.
To create a drainage "pillow" the bottom is covered with a meter-long layer of gravel or gravel.
Laying the pipeline to the septic tank
To the location of the treatment plant, dig a ditch for laying the supply pipe. You can do this manually or by renting special equipment.

For the laying of the external pipeline, polymer pipes with a diameter of 110 mm are chosen that do not enter into chemical reactions with organic matter and water
The work on laying the outer pipeline is performed in the following sequence:
- Dig a trench. Its depth should be below the level of soil freezing. When determining the width of the ditch, it is important to consider that the discharge pipe will need to be additionally insulated.
- Equip a “pillow”. The bottom of the trench is rammed and lined with a sand layer, making a bias of 2-3% in the direction of the treatment plant. So for a pipe with a length of 10 meters, the slope between the upper and lower points will be 20-30 cm.
- Stack pipesplacing the bells down. When assembling into a single structure, the elements are connected using special glue. For greater reliability, the composition is applied to the ends of both docked elements.
- Mounting inspection hatches at the point of connection to the house and at the turns of the pipeline.
- Drain elements dock. The pipe is led to a hole in the wall of the septic tank. The jointing point on the outside is covered with cement mortar.
If in your region the level of soil freezing reaches about 2 meters and the deepening of the external pipeline to such a mark does not seem appropriate, it must be carefully insulated.
An excellent solution in this case would be the option when a plastic pipe is placed inside a cast iron, and a layer of insulation acts between them. Some hosts use a heating cord for this purpose.

To reduce the likelihood of leaks, when sawing and connecting the elements of a plastic pipe, it is important to strictly adhere to the recommendations prescribed by the manufacturer (+)
In order to protect the internal sewage system from sewage from the street, as well as from the penetration of rodents into the house through pipes, it is recommended to place a non-return valve at the outlet of the pipeline from the house.
When laying the outer pipe, complex turns and right angles should be avoided. At turning points, pipes should be equipped with inspection hatches.
When all pipes are laid and connected to check the correct operation of the system and the tightness of the structure, it remains only to perform the first start-up of water.
Useful videos will help you quickly cope with the installation of a septic tank, pipeline and plumbing devices.
The device of the house system:
How to properly lay the pipeline:
Option of arrangement of a septic tank:
Properly completing the design, you will ensure uninterrupted operation of the autonomous system and create comfort in a country house. And having correctly completed the installation, you will protect yourself from additional efforts to maintain the system and carry out repair work.
Do you have personal experience in designing and arranging sewers in a country house? Want to share your knowledge or ask questions about the topic? Please leave comments and participate in discussions - the feedback form is located below.