It turns out that choosing a siphon for a shower cabin is not so simple. A number of questions arise: what is its function, what varieties are on sale, what is the difference between their design and what parameters should you pay attention to when buying?
We will try to help you deal with all these issues - in our article you will find information on the types of siphons, their design features, the pros and cons of each type. As well as recommendations for choosing the right option for your shower and detailed step-by-step installation instructions.
Why use a siphon?
Not only the shower tray, but also all other plumbing fixtures must be connected to the drain through a siphon. The task of this element of the spillway fittings is to provide unimpeded drainage of water from the shower cabin to the sewer.
Manufacturers are developing new, improved models that do not just flush water, but contribute to its rapid drainage in seconds.

The smell from the sewer is not just unpleasant. Gases may be toxic and hazardous if inhaled.
This creates a water plug that does not allow sewage odors from the pipe into the room. More detailed information on the drainage trap is described here.
A water trap is a special siphon design. If you do not use the shower for a long time, the water plug may dry. If this happens, the bathroom will be filled with an unpleasant odor.
Correcting the situation is very simple - turn on the water. A new hydraulic shutter forms and the problem disappears.
Image Gallery
Photo from
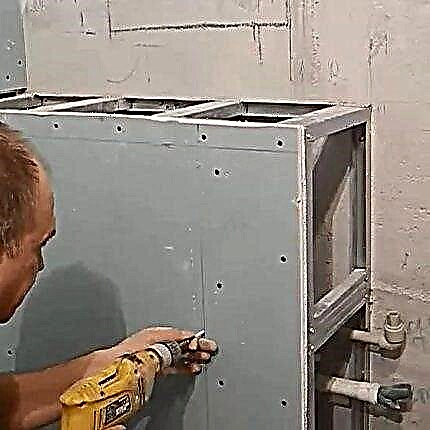
Shower with integrated floor tray
The space between the pallet and the floor
Siphon for low shower trays
Water trap for high pallets
Siphon classification by design
By design features, several varieties of siphons are distinguished:
- bottle type;
- pipe;
- corrugated;
- dry.
Separately, the presence or absence of overflow in the design should be highlighted. All of them can be used when connecting the shower tray. When choosing a specific variety, you must consider the presence of an overflow hole in the design of the pallet.
If the pallet for the booth is equipped with an overflow, an appropriate siphon is necessary, because when the pallet is full, water through the hole will simply flow to the floor.
Such reinforcement can be any of the above varieties. A distinctive feature is the presence of an additional pipe connecting the siphon design and overflow.

The presence of such a feature as overflow makes the use of a shower tray more practical. With sufficient depth in it, you can bathe a small child, as in a bath, or even arrange a wash
As a rule, the upper hole has a smaller diameter - about 4 cm. The connecting hose is made flexible - from a corrugated pipe, since the location of the overflow can vary depending on the type of shower, and the siphon should fit most models.
And now let's take a closer look at the main types of siphons. To understand how they work, you need to familiarize yourself with the features of each type, as well as their disadvantages and advantages.
Type # 1 - Bottle Siphon
The first type of siphons is the bottle type. In its design, it resembles a flask. A drain from a pan with a filter grate (outlet) is connected at one end, and a sewer pipe at the other end.
A hydraulic shutter is formed due to the fact that the outlet from the siphon is located above the edge of the inlet pipe.

There are two construction options: with a tube immersed in water, or with two communicating chambers with a partition. Both varieties are equally effective.
The device is made of plastic. In the lower part, a precipitate is collected, which must be periodically removed.
To clean the bottle model, drainage must have access from below, and the design of standard shower trays rarely implies a convenient height. For this reason, the classic bottle form cannot be used on low pallets.
Type # 2 - pipe version with a water lock
An equally common option is a pipe siphon. It is a curved tube made of hard plastic. A bend is required.
Most often, pipe models are made in the form of the letter “S” or the letter “U”. This configuration provides a natural formation of a water plug in bends.

In addition to the height of the siphon itself, it is necessary to take into account the necessary deviation angle for normal outflow of water. The reference point is the insertion point into the sewer pipe
The pipe siphons are compact and easily fit under the shower stall. There are modifications for pallets of any height, even for the lowest. Due to the smooth inner surface of the plastic from which the device is made, contaminants do not accumulate on the walls, but are sent directly to the drain.
The main advantages of this type of spillway fittings are durability and the absence of the need for frequent cleaning.
Type # 3 - Corrugated Siphon
The most popular siphons for low pallets are from corrugated pipes. By the principle of operation, they are identical to ordinary tube models, but their main feature is contained in a flexible and flexible corrugation: the siphon can be manually set to any suitable shape.
This versatility makes corrugated models suitable for all showers.

The main condition - the bend of the siphon must be made so that the water in this place overlaps the pipe hole completely. Only in this case will the hydraulic shutter function correctly
The main disadvantage of this design is caused by the structure of the corrugated hose. Since its entire inner surface consists of small folds, dirt accumulates in them.
In addition, to ensure the necessary flexibility, the wall thickness of the hose is low enough, which is also displayed on the durability of the device. The siphon quickly fails and requires cleaning.
Type # 4 - Dry Siphon Option
In order to ensure the smallest possible height of the siphon, manufacturers abandoned the usual water shutter in favor of a new technology for protection against sewage “aromas” - a silicone membrane.
Models with such a system are called dry siphons, because the water in them does not linger, but goes directly to the drain. The silicone membrane acts as a valve, passing water in the right direction, but retaining gases from the drain.
It has the form of a tightly rolled polymer tube, which straightens and passes a stream of water, and as soon as it stops, it takes its original position.

Another advantage of this design is that it does not freeze and does not dry out. Even with a heated floor - a frequent culprit in the evaporation of a water trap and the appearance of unpleasant odors in the bathroom - the silicone membrane does not suffer
This feature plays an important role in rooms that are heated inconsistently, for example, in a freestanding bathhouse or sauna in the country. In this situation, the presence of a siphon, which does not need to be “tinned” each time so that it does not crack from frost due to the water remaining in it, is a significant plus.
This type of siphon is the most expensive, but its effectiveness justifies the high price. Fittings with a dry shutter are installed even under the lowest shower trays where it is impossible to install other models.
In addition to the high cost of the device itself, in the event of a membrane contamination or damage to the membrane, repairs will be expensive.
For more information on the types of drain for the shower we reviewed in this article.
Types of siphons according to the method of discharge control
Tray siphon - part of the drain design. Often there is a need to leave some water in the pan. For this, the siphon outlet is blocked.
There are several options for how to do this:
- using cork;
- using the lever;
- by clicking on the button.
Consider all methods of managing the drain to understand how they work.
Cork as a control mechanism
The most primitive elementary option is a cork construction. This outlet is not equipped with any valves, the water just leaves the sump through the hole and goes straight to the siphon. To draw water, the drain hole is manually blocked with a plug.
This design does not represent any complexity. This technique is familiar to everyone, because it is used in ordinary bathrooms and sinks. In modern showers, conventional sinks are used less and less.

Siphons for pallets, in which the drain hole is closed if necessary with a stopper, are in little demand. They are superseded by more convenient models with a button
The concept of “drain plug” will soon disappear completely from use, new automatic devices will replace it.
Lever control via lever
An outlet with an automatic bottom valve is much more convenient than a conventional “plug” system. You do not need to constantly look for this very cork, the hole overlaps automatically when you turn the lever.
The design is quite simple, the lever is usually located in the area of the mixer. The valve and mixer are sold and installed together, which is not very convenient.

The rotation of the valve leads to a partial or complete overlapping of the drain hole. Such a system is convenient in that there is no need to bend over, look for a cork or immerse your hand in water
Click-clack button for water discharge
Apart from the faucet, the Click-clack automatic drain valve, also known as Push & Open, can be purchased. The valve is a large button that you can press with your foot.

The drain system, equipped with a button, is convenient to use, looks stylish and does not require immersing your fingers in dirty water to release water, as in the case of a cork
When pressed once, the drain is closed, when pressed again, it opens. Using such a device is easier than ever, and installing it is much easier and faster than a lever automatic valve.
Features of the choice of spillway fittings for the shower
Choosing the right siphon for the shower tray is not such a simple task as it seems at first glance.
Decisive factors to rely on when choosing:
- geometric dimensions - hole diameter and height;
- material quality;
- technical characteristics - bandwidth and performance;
- installation complexity;
- operation features.
Having comprehensively assessed the model you liked by all indicators, you can finally make a choice.
The geometry and appearance of the device
The mounting height is selected depending on the design of the pallet and on the method of installation. If the shower is installed on a raised platform, the range of sizes is significantly increased.
Most often there are siphons with a height of 8 to 20 cm. It is most difficult to choose the suitable option for low pallets that are installed directly on the floor. We recommend that you familiarize yourself with the information on how to choose the siphon for the low tray.

Low pallets, as a rule, are installed without any reason, directly on the floor, and even glued with mounting foam tightly, without thinking about the consequences. The siphon for such a booth must be chosen with all responsibility, because its replacement will require considerable effort
By standards, the diameter of the drain hole can be:
- 52 mm;
- 62 mm;
- 90 mm.
Here the choice is obvious - the diameter of the inlet grate of the drain valve must coincide with the hole in the pan. When buying, evaluate the build quality and the parts themselves.
The plastic case must not have visible damage: cracks, scratches, chips, dents. Any traces of deformation of the product will undoubtedly affect the tightness of the fittings and will let you know about it by quick leakage.
Technical parameters and features
The capacity of the siphon shows how many liters of water per second goes into the sewer. This indicator is important for showers, because the depth of the tray is usually low, and a lot of water is consumed.
So that the pan does not fill up and the water has time to leave, the drainage fittings must be selected in combination with the mixer and its performance.

The minimum throughput is standardized by GOST 23289-94. For low shower trays with an outlet it should be at least 15 l / min, and for deep trays and siphons with overflow - at least 21 l / min
The throughput is calculated according to the height of the tray itself and the diameter of the siphon outlet. The discharge diameter of 5.2 and 6.2 cm makes it possible to collect up to 12 cm of water in the pan, a diameter of 9 cm - up to 15 cm.
Performance and installation complexity
Installation of plastic models of siphons is carried out using a minimum of tools. The main thing is to observe the tightness of all connections.
According to normative documentation, drain valves must be easily disassembled by hand, which is very important in emergency situations when the drain is clogged or broken.

A good addition - catchers for hair and large debris. These nets make siphon maintenance easy and quick.
The main difficulty in operating the siphons for the pallet is cleaning. When choosing a siphon, analyze how easy it is to get to it and whether it is possible without dismantling the entire cabin.
Some fittings with an outlet diameter of 90 mm can be cleaned directly through the drain hole. Its size allows you to disassemble and take out all the necessary elements, and then install them in the reverse order. There are also self-washing models.
Siphon Installation Instructions
Installation of a siphon for a shower cabin with a tray can be carried out without the involvement of a professional plumber. You can do this yourself, as any special tools or special skills are not required.

Of the tools you will need an adjustable wrench and a gun for sealant in the tube. When choosing a sealant, pay attention to its composition - it is better to take silicone for a shower cabin
The installation process can be described as follows:
- Set the pallet on the base. We recommend that you look at the step-by-step installation instructions for the pallet.
- Make measurements. The height of the drain hole of the shower cabin should be several centimeters higher than the height of the inlet to the sewer pipe. It is necessary to observe a slope of 2-3 degrees.
- If the pallet is installed correctly, proceed with the installation of the siphon. To begin with, it should be disassembled in accordance with the instructions.
- All connections should be sealed to prevent leaks.
- A grate and a gasket are installed in the drain hole.
- If there is overflow, install a cone-shaped gasket and nut onto the corrugated tube. Connect one end of the corrugation with the overflow hole, and the other with a siphon.
- Screw the collected siphon to the outlet and overflow. On a flexible pipe put on a rubber gasket and a union nut. Tightly tighten.
- An element with a pipe is inserted into the sewer pipe. More about the process of connecting the shower to communications, we examined in another article.
- Connect the fittings to the sewer.
After installation, a trial run is carried out. If there is an automatic bottom valve, check its operation.Gather a full pan and drain the water. As a rule, if there is a depressurization, when draining a large amount of water (under the pressure of its own weight), the leak is easy to detect.
Drops may appear at the junction - this is a bad sign. In this case, you have to start all over again and devote more time to isolation.
Another important tip: do not overdo it with a tightening screw. Tightened joints may cause gasket deformation. In this state, it is not able to fully perform its function, which becomes a frequent cause of the wet floor under a siphon.
Briefly, the process of installing and connecting a shower siphon will be demonstrated by the following selection of photos:
Image Gallery
Photo from
Before installing and connecting the siphon, the device is assembled, mounting studs are installed, with the help of which the siphon body is attached to the pallet
On the edge of the siphon, which will lie on the bottom of the pallet, put a rubber gasket
The pipe, which is always sold with some margin for trimming, is cut to the required length. On the connection line of the pipe to the siphon we put a seal
In the siphon case with a connected pipe, which can be connected directly or at an angle, we install a water seal cup
We fix the device to the pallet with the metal studs available in the configuration
We close the siphon fixed on the pallet with a protective plastic cover
The siphon, assembled and fixed on a low pallet, is covered with a decorative protective cover from stainless steel
We check the tightness of the joints and the operation of the water seal by collecting water in the device. After confirming the normal operation, put the siphon tray in place
Step 1: Assembling the shower trap body
Step 2: Install the O-ring
Step 3: Preparing the siphon pipe for connection
Step 4: Install the water seal cup
Step 5: Attaching the Water Cup to the Insert
Step 6: Attaching the Device Screen
Step 7: Attaching the Decorative Metal Cover
Step 8: Installing the siphon tray at the planned location
Post installation care and maintenance
The operation of the siphon is reduced to inspection and cleaning if necessary.
In order for the fittings to fail as rarely as possible, it is recommended to do preventive flushing once every six months. This is done using special chemicals that are suitable for plastic pipes.

If a blockage occurs, it is better not to pick the drain with a metal ruff or other sharp object, you can aggravate the situation even more. In a fragile corrugated pipe, it is very simple to punch a hole. In this case, the complete dismantling and disassembly of the entire structure is inevitable
Another unacceptable cleaning method is blowing with compressed air under high pressure. The shower tray siphon consists of several components. Its weak point is connections.
High pressure will almost certainly cause a depressurization and failure of the entire system.
Timely care of plumbing, fittings and sewer pipes will avoid many troubles in the future. Otherwise, you may encounter a blockage in the sewer.
We have on our site a number of useful articles on choosing the best tool and methods for eliminating blockages. We recommend that you familiarize yourself with them:
- How to choose a tool for cleaning sewer pipes: a comparative overview of all types of tools
- How to clean the sewer pipe at home from clogging: solutions + prevention tips
- Sewer pipe cleaning: a walkthrough of all cleaning methods with step-by-step instructions
To avoid any questions about the structure and installation sequence of siphons of various modifications, see the proposed video reviews and instructions.
The structure of the siphon “click-clack”:
Assembly of the bottle model:
A step-by-step guide on how to dismantle an old siphon and install a new one:
Drain siphon for the tray - an obligatory part of the shower. Having familiarized yourself with its purpose, varieties and design features, you can easily make the right choice when buying and make the installation yourself.
Have you installed a siphon on your own shower tray? Tell us, what type of siphon did you choose and did you have any difficulties during installation?
Whether you are satisfied with your siphon or maybe you want to replace it with a new one with a different type of design - share your experience in the comments under our article.