The issue of arranging ventilation is relevant among owners of apartments and private households. After all, it is immediately necessary not only to determine the scheme, create a project, but also to implement it by completing installation work. Agree, it would be nice to arrange everything yourself, saving on the call of the master.
But you do not know where to start and how to act? We will try to help - in this article options for installing the hood and their features are considered. So, one of the simplest solutions is an extractor hood for a kitchen with an air duct. If you wish, it is easy to arrange it with your own hands, before starting work, having studied in detail all the nuances given in this material.
Also, the article is supplemented with photo collections of step-by-step assembly, installation and connection of an exhaust device. For a better understanding of the material presented, videos on manufacturing air ducts and connecting hoods are selected.
Features and rules for choosing a hood
In the kitchen, the hood is not only one of the elements of the ventilation system. Often it is an independent detail of the interior, a certain accent or the final chord of the chosen style solution for a particular room.
In order for it to function perfectly and delight with its impeccable appearance, you have to choose the right option.
Image Gallery
Photo from
Hood in the interior of the kitchen
Variant message option
Cooker hood area
Volatile equipment
Variety of forms and styles
Using an island hood in the kitchen
Installing a hood in a corner of the room
Power Equipment Selection Requirements
Varieties of kitchen designs
A variety of shapes, sizes, additional functions and a significant price range makes it difficult to choose. First of all, it should be understood that the hood is equipment designed to remove exhaust air from the room containing particles of grease, dust and an unpleasant odor.
For example, when the homeowner fries chops and wants to protect the rest of the family from this overly intrusive smell, he will turn on exhaust equipment. If the aroma of coffee is in the room, then you can do without it.
Model Specifications
It is important that the hood is designed for such loads and can successfully remove harsh and unpleasant odors in full. This is ensured by the purchase of the device of the required power.

Be sure to look at the instructions of the model you like, paying special attention to the boundary maximum power. Stock is needed here - the hood cannot work at full capacity
When choosing equipment, it is necessary to carefully study the technical specifications indicated by the manufacturer in the accompanying documentation.
A suitable option is to remove the exhaust air volume, which is 3 times the volume of the kitchen. For example, if the room area is 12 m2, and the ceiling height is 2.7 m, then its volume is 12 * 2.7 = 32.4 m3.
To cope with its main function, the hood must remove at least 32.4 * 3 + 20% = 117 m3. A margin of 20% is needed so that the device does not constantly work at the limit of its forces. Otherwise, such work will quickly disable him.

Many models of hoods are equipped with an original hood that can hide all the unsightly parts of the hood
Preferred Mounting Type
By type of installation, all hoods can be divided into:
- recessed;
- open.
The first type of equipment - the built-in range hood - has a more modest appearance. They are installed inside cabinets or other kitchen furniture. Inoperative, they are almost invisible.

A wall-mounted hood integrated in the kitchen will hide the most unsightly part of the duct and exhaust equipment. Not only can it be mounted in a cabinet, there is also a place for kitchen utensils
The second type - open hoods - can have the most intricate shapes and sizes. Their cost can be shocking, especially if it is a design model that exists in a single copy.
Cooker hood shape
Depending on the shape of the product, these hoods are distinguished:
- angular;
- island
- wall.
The latter do not require installation of the duct with subsequent connection to the ventilation shaft of the house. This is an option for extracting without venting to ventilation.
Their design provides for the presence of several types of filters, including a carbon filter, a greasy type of filtering device and others, providing local air purification, and not its removal from the room.
All other options for hoods need a ventilation duct. In terms of size, material used and cost of the product, you can always choose the most suitable option, taking into account the wishes and financial capabilities of the owner of the house / apartment.

The duct can be compactly located above the kitchen set or it is indecent to draw attention to yourself, grossly violating the harmony of design
Landmarks and nuances of choice
In order for the hood to be a beautiful and useful part of the kitchen interior, you need to choose a successful model. To do this, you have to choose a product from a manufacturer who has a good reputation.
The price does not have to be high, the main thing is that all the quality documents, instructions for use and warranty are available from the seller. Otherwise, it is better to look at another option.
An ideal hood should perform the following functions:
- to qualitatively remove odors;
- create a minimum of noise;
- look aesthetically pleasing;
- blend harmoniously into the interior.
The main purpose of this element of the ventilation system is to remove exhaust air. No matter how beautiful and perfect its design may be, but failure to fulfill its main task makes such an extract a useless trinket. To avoid this, when buying, special attention should be paid to power.
If the hood is correctly installed and connected, it does not make noise loudly. If, during the installation process, mistakes were made, the wrong parts were selected, and the power of the device itself does not meet the required norm, then you should prepare for a high noise level - 50 decibels or more.

The high noise level from the working hood during cooking is guaranteed to provide a headache to its hostess. If the noise level is 60 decibels or higher, measures should be taken to reduce it.
The main problem is to harmoniously fit the purchased hood into the existing kitchen interior. Especially when the ventilation hole is at a considerable distance from its location.
Here, the construction of a duct for laying the duct from the hood to the entrance to the ventilation shaft of the house will come to the rescue.
It is important to give the duct and hood an aesthetic appearance at the end of installation work. This applies to both purchased equipment and home-made designs.

Even the most stylish and expensive model of the hood will look ridiculous if you do not properly arrange the ventilation duct
The specifics of equipping a cooker hood
For the kitchen hood, in addition to the equipment itself, additional materials will be required - an air duct and fasteners for it, a duct and fasteners for its installation.
It is advisable to immediately buy other supplies needed for the connection. It is more convenient when all the components are of the same brand, so that a complete match in color and size is ensured.
Subtleties of choosing and installing ducts
Among the ducts offered in construction stores, you can find the following:
- corrugated polymer;
- aluminum corrugation;
- corrugation made of stainless or galvanized steel;
- plastic round pipe;
- plastic rectangular duct.
The most used for equipping household ventilation are aluminum corrugation and plastic pipes of rectangular and round cross-section.
This is due to the ease of installation, which even an inexperienced home master can handle.

Corrugated plastic pipe as an air duct is the most undesirable option. It is better to buy an aluminum analog
Some inexpensive models of hoods come with a corrugation made of plastic. To use it or not - it depends on the type and size of the plate over which the exhaust equipment is to be installed.
If the kitchen has a gas stove, then the craftsmen prefer to buy a good metal corrugation from a reliable manufacturer instead of the plastic that comes with the kit.
To equip a household ventilation duct, you should choose a quality product. Too delicate and thin foil corrugations can tear from careless handling during installation.
Corrugated metal pipe in some interiors fits harmoniously without the need to come up with options for masking it. Although most often it is necessary to hide it in every possible way, so as not to upset the harmony of the kitchen space.

Aluminum corrugation against the background of an expensive kitchen set made of wood looks at least ridiculous
The corrugation is installed simply - it is enough to attach one end to the pipe of the hood itself, and insert the second into the grill of the ventilation shaft.
Clamps, aluminum tape, sealant are used as fasteners.

The corrugation is well cut with scissors, it is convenient to stretch and bend in any direction. This allows you to lay even long and intricate channels without sharp turns
Round and rectangular plastic pipes look more aesthetically pleasing. They do not bend in different directions. Their installation is also not difficult - all parts are attached to each other, like a designer.
To join, they buy special adapters. It is inconvenient that the turns here will be sharper, and not smooth, as in the case of a corrugated pipe.

The undoubted advantage of such ducts is the geometric clarity of the lines. This allows you to organically look among other kitchen furniture, which also has strict geometry.
Choose for your kitchen exactly the option that will more harmoniously fit into the interior. If the budget involves the use of a very small amount for the purchase of the duct, then you can buy an inexpensive aluminum corrugation and skillfully disguise it.
It is worth noting that the desired footage of the corrugated pipe is measured in a stretched form. And the right length of the smooth plastic pipe should be accurately measured at home, given that the turns will be clear.
Immediately you need to buy all the pipe adapters and preferably from the same manufacturer.

The use of adapters from round to rectangular section and vice versa is poorly reflected in the draft of the ventilation duct. If possible, you should refuse such a decision.
Another important point when buying a ventilation duct is the selection of the correct diameter recommended by the manufacturer of the hood. A smaller or larger pipe will contribute to poor equipment performance. It is also best to purchase all the fasteners of one company.
Equipment mounting options
When the hood and all additional parts are purchased, it remains to put it and connect it to the ventilation system.
There are 2 options for carrying out this type of work:
- do it yourself;
- hands of a professional.
Each of the options has its pros and cons.
The sequence of works on the construction of a hood with a flexible duct will demonstrate a selection of photos:
Image Gallery
Photo from
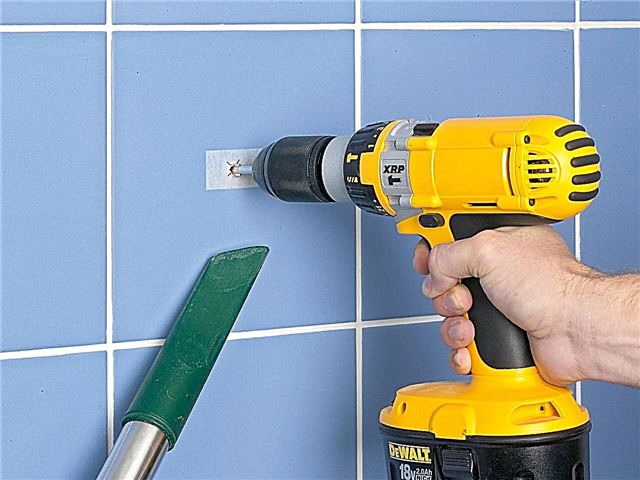
Step 1: Drilling a vent hole
Step 2: Trying on the corrugation to the installation site
Step 3: Drilling holes for mounting the hood
Step 4: Fixing the dowels and tightening the screws
Step 5: Trimming excess corrugated pipe
Step 6: Fitting the structure to the installation site
Step 7: Connecting the corrugation to the hood from the inside
Step 8: Mounting the hood at the installation site
If you trust the masters, you will have to pay a decent amount for their services.
And it does not make sense to call a cheap brigade - they can turn out to be bad specialists, capable of spoiling expensive equipment.

For installation, adapters, clamps, fasteners, silicone sealant and other consumables may be needed. They should be bought along with the duct and duct, having calculated in advance
The first option is more reliable if the home foreman has some experience in repair or construction work. When the owner does everything with his own hands, he knows what is delivered and where.
Also, no one will deceive himself - all the work will be performed efficiently. Just need to carefully study the instructions so as not to lose the warranty on the hood.
When performing work on their own, the following are important:
- safety;
- correct connection;
- great appearance.
To ensure the safety of the installed element of the ventilation system, it is necessary to strictly comply with the requirements of the manufacturer's instructions and recommendations. After all, each model hood has its own characteristics.
The materials used in the manufacture are also different - stainless steel can withstand higher temperatures than plastic.

To work with elements of the kitchen ventilation system made of stainless steel, metal clamps, adapters and a ventilation grill will be needed
To independently connect a cooker hood to ventilation, you must first attach it. For this, the manufacturer's recommendations set out in the instruction manual are useful.
Each type of hood has its own installation features. For example, for built-in models, you will have to cut a hole in the bottom of the kitchen cabinet, and the dome ones are attached to the wall with the fasteners that come with the kit.
Having installed the hood, it is necessary to attach an air duct to it, the second end of which is attached to the entrance to the ventilation shaft of the house. It will not be superfluous to install a check valve immediately.
The duration and complexity of subsequent work depends on the type of duct used to connect the hood in the kitchen to the ventilation system.

Smooth plastic pipes of round section fit well into the interior of the kitchen, executed in bright colors
If the selected ventilation duct does not fit the overall style composition, then you have to mask it. For these purposes, special boxes are used.
Such products are able not only to hide the duct, but also to decorate the kitchen space. But their installation may require considerable strength and skills from the master.
Types and nuances of installation of ventilation ducts
To mask individual elements of ventilation equipment, you can purchase a special box. Most often, you need to hide the duct, knocking out of the big picture.
It is for this component of the kitchen ventilation that you can build a box yourself. Which option is appropriate in a particular room is up to its owner only.

Meters of a pipe stretching from the hood to the shaft can kill even the most original idea of decorating a room. It is better to choose an option to mask the duct
Depending on the material of manufacture, you can buy the following options for boxes:
- plastic;
- aluminum;
- from stainless steel;
- wooden.
Next, we consider the features of each of the options voiced.
Features of the use of plastic
Plastic pipes used as ducts are often called ducts. Due to their clear geometric shape, they do not require the use of any additional material for masking.
Unless in the absence of the desired shade on sale, they can be painted with moisture-proof and heat-resistant paint. Such a move will allow the ventilation duct to become inconspicuous.
Image Gallery
Photo from
Step 1: Plastic Duct Parts
Step 2: Arrangement of access to the ventilation shaft
Step 3: Checking the Check Valve
Step 4: Assembling the structure on the floor of the room
Step 5: Initial assembly steps
Step 6: Connecting the duct to the exhaust outlet
Step 7: Connect the hood to check the action
Step 8: Leak Test
Metal fume hoods
Metal boxes are an expensive solution. They are interconnected as well as plastic, using adapters.
But in view of the greater weight, they require more reliable fixation along the path of the ventilation duct.

The stainless steel used to make the fume hood can be of different thicknesses. This material fits nicely into a high-tech kitchen. You won’t immediately guess that the aluminum corrugation hid inside
Wooden box construction
A fume hood made of wood gives a special atmosphere to the room. Such products should be used in wooden houses, where all furniture is simple and made of environmentally friendly materials.
For the apartment, the use of wooden boxes is also acceptable, the main thing is that the style of the kitchen design matches.

For the installation of wooden boxes, materials recommended by the manufacturer should be used. It is best to immediately purchase all fasteners and adapters when buying a box.
Drywall box manufacturing
Another material used to make the box is drywall. It is used by craftsmen who prefer to make a construction for the ventilation duct with their own hands.

Independent construction of the exhaust duct allows you to implement any design idea, without relying on the standard sizes of purchased products
Usually such a box is puttied, primed and painted in a suitable color. At once, at the stage of installation, a backlight is built into it.
This distracts attention, giving the room an unusual look due to a two-level ceiling and additional light sources.

Looking at the level design of the ceiling, it is difficult to assume that all this is implemented to hide the duct. For such work it is better to invite specialists
Arrangement of the hood without duct
A kitchen hood with an air duct can be arranged without using a duct.
This happens in such cases:
- the mine is located nearby;
- the use of a false ceiling;
- hood without duct;
- plastic pipes of rectangular / round section.
To mask the hood itself, a kitchen cabinet is sometimes used.
The best location for the hood is under the hole in the ventilation shaft. In this case, the corrugation can be closed with a beautiful hood of the hood.

Some models are equipped with a decorative casing, which successfully hides all the excess from the picky eyes of the owner of the kitchen
If the kitchen provides for the installation of a false ceiling, then all the designs of the exhaust system will hide well under it. The main thing is to warn the masters who will be engaged in the ceiling about this.
When the hood is installed in the kitchen without a ventilation duct, then there is no need for a duct. In the case of the use of plastic pipes as an air duct with a rectangular or circular cross section, it is quite possible to do without a duct.

Plastic pipes made by a bona fide manufacturer may not lose their attractiveness for a long time
A step-by-step video about collecting the duct for a kitchen hood from rectangular plastic pipes with a section of 60x120:
Visual video tutorial on the manufacture of duct ducts simulating a two-level ceiling. For greater efficiency, it is equipped with decorative lighting:
A short video about the features of installing plastic ducts:
Video installation instructions for the hood:
Having studied the features of installing the hood and its connection to the ventilation shaft of the house, you can choose the most suitable option for your kitchen.
In the case when the budget is limited, all installation work of the hood, duct and duct can be done by yourself. You can choose all the components of a kitchen ventilation system in an inexpensive price range.
Did you install a cooker hood yourself and connected a duct to the ventilation system? Or maybe you have experience in manufacturing the original duct duct? Share your knowledge with beginners in this matter - leave comments on this article.