The most active consumer of electricity in a house or apartment is a kitchen appliance. Therefore, it is important that all outlets in the kitchen are located correctly. This will ensure usability and protect. After all, one incorrectly installed outlet can bring many negative consequences, including causing a fire.
We will familiarize you with all currently used power point device options and types of wiring accessories. We have meticulously laid out installation technologies and listed common mistakes that an inexperienced master can make.
We offer the best layouts to interested visitors. Based on the information provided, you can easily decide on the location and device outlet. The text is supplemented by illustrations and video instructions.
Features of using kitchen outlets
The number of points for connecting to the mains depends on the size of the kitchen and the functions that it will perform. In very small kitchens, it is problematic to place a large number of electrical appliances.
The premises of a larger area make it possible to roam the imagination and desires of the hostess of the house / apartment.

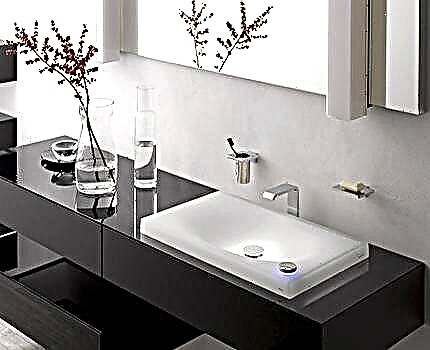
Outlet manufacturers offer stylish built-in kitchen solutions that allow you to economically use your workspace
Regardless of the area of the kitchen, the availability of electrical appliances and the number of installed outlets, there are general requirements that they must meet:
- safety of use;
- Free access;
- high-quality installation.
Do not forget that cooking increases the level of humidity, and the use of various powerful equipment gives a high load on the power grid. Therefore, it is important that all outlets installed in the kitchen comply with safety rules.

To protect yourself and your loved ones from danger, you need to place additional blocks of sockets in the kitchen further from the sink and stove
Firstly, you can not put them over the stove and sink. This rule is important to observe when planning and choosing a furniture set. If there have been dramatic design changes during the repair of the kitchen and the outlet goes directly above the stove, then it must be transferred. You should not endanger your life and hope that everything will somehow work out.
Secondly, if it so happened that electric points were hidden under the sink for connecting kitchen appliances and appliances, then it is advisable to place them above the siphon. The degree of moisture protection of such outlets must be at least IP44.
Thirdly, if small children live in the apartment / house, then this fact must be taken into account. It is better to buy special sockets with curtains and other child protection options. Also, provide such an arrangement so that the electric points are higher than the height of the child.

The kitchen outlet, hiding in the countertop, is able to reliably hide from a curious children's look. After all, from the height of the child’s height, she is not visible
Thirdly, regardless of who installed the sockets - the called specialist or all the work was done on their own, when connecting / disconnecting devices, nothing should hang out, sparkle and smell like burnt plastic.
Fourth, for each powerful electrical appliance, a separate line and connection point should be provided.
Varieties of kitchen outlets
The functionality of the room and its appearance depend on the correct location of outlets in the kitchen and compliance with installation technologies. Manufacturers offer many different kitchen solutions:
- overhead designer models;
- built-in options mounted inside the wall;
- hidden sockets hidden in drawers, cabinets, closet or countertop;
- angled with or without a fork ejector.
The option of overhead sockets is less often chosen for the kitchen. After all, when the entire mechanism is protected from external influences only by the box of the outlet itself, this raises concerns about the safety of its use.
Built-in models with grounding are often used to connect powerful kitchen appliances, placing them so that there is free access. Manufacturers offer many different models that can harmoniously fit into the style of any design interior.

Built-in models of outlets for the kitchen are better to choose with a protective cover so that excess moisture, grease and dust do not get inside
Hidden outlets mounted on the countertop are cut into kitchen furniture, hidden in drawers leaving the cabinet, and used as additional points for connecting rarely used appliances.
They are a stylish addition to almost any interior solution, allowing you to save useful space.

A socket hiding in a drawer can be used as a backup connection point for appliances that the kitchen owner rarely uses
Fashionable and functional trend in the world of sockets - corner models. They come with and without a fork ejector. This option allows you to use the free space of the corners between two walls or between a wall and a countertop.
Manufacturers offer strong and attractive solutions that harmoniously complement the interior of the kitchen.

Outlets placed in the box between the countertop and the wall are used as needed. They are securely closed with a protective cover so that moisture, dust or grease do not get inside.
The best accommodation options
The question of installing electrical outlets in the kitchen arises on the threshold of repair. It is necessary to approach his decision carefully, in order to avoid trouble in the future. Firstly, you need to plan what kind of equipment will be installed in the kitchen. You also need to consider the electrical appliances to be used.

When calculating the required number of kitchen outlets, one should not forget about such devices as a mixer, coffee grinder, inhaler and others that are not often used
Then it is important to determine the model of the kitchen set, comparing its actual dimensions with the repaired room. When choosing furniture, one must take into account all the desires and needs, so that after a month, when all the rough work has already been done, suddenly not change your mind.
If, nevertheless, a decision has been made to radically change the design and order other furniture, then it is imperative to revise the previous scheme for placing electrical outlets in the kitchen. In the case when the installed sockets do not fit into the new version of the arrangement of kitchen furniture, it is better to transfer them, for security purposes.
When planning the installation of electrical points for connecting kitchen appliances, it is advisable to use the rule of vertical zoning.
So, for consumers of electricity located on top - an extractor hood, kitchen cabinet lighting, a TV, additional light sources - top-level sockets should be provided. They are located at a height of 5 to 10 cm from the top edge of the wall cabinet.

When planning the location of electric points, do not place the sockets of the upper level too high above the wall cabinets. They will be noticeable, which will spoil the overall impression of the design (+)
The average level is electric points for connecting low-power kitchen appliances. They are conveniently located above the countertop to provide the most simple and quick access. The preferred distance is from 10 to 30 cm from the level of the countertop. For security reasons, sockets of this level must be removed from the stove and sink to a distance of about 60 cm.
For built-in kitchen appliances, low-level sockets should be provided. They are located at a distance of 30 to 60 cm from the floor. Most often, they are placed in adjacent cabinets and cabinets, having cut out the corresponding holes in the rear wall for this.
The option of mounting the outlet behind the stove or dishwasher itself is considered unacceptable due to the lack of free access to it.

When the sockets for plugging in the dishwasher are placed very low from the floor under the sink, this may end badly if there is a leak (+)
When completing planning, you need to add a couple more spare ones to the total number of required connection points. Also, do not forget about the need to periodically turn on the inhaler, gadget chargers, laptop and other portable equipment. For such devices, it is convenient to use extendable models and sockets that are built into the countertop.
Read about how to transfer an electric point to another place in another article on our website.
Detailed installation instructions
The most important thing in installing outlets is to approve the number and location. This issue should be resolved first. Having decided on a plan for placing electrical outlets in your kitchen, you can proceed to the following work.
First you have to do the markup, indicating where exactly and how many outlets you need to install. Next lay the power cable to the kitchen. Here you need to consider the number of powerful energy consumers.

When marking the places of the future location of electric points, one should not be afraid to clearly draw them. In the future, with clear lines it is much more convenient to work
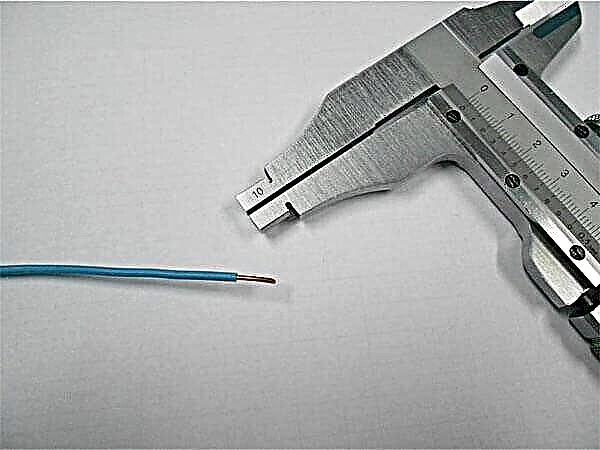
For example, a boiler, an electric stove or an oven need to lay separate wires for connection. Their high power involves the use of a reliable and high-quality cable made of copper with a cross section of 6 mm2 for a single-phase voltage circuit and a cross section of 4 mm2 for three phase.

The wire cross section must be selected taking into account the power of the devices that will be connected (+)
When laying the cable to install the outlet for the electric stove, 40 A circuit breakers or 32 A fuses must be installed. For less powerful consumers of electricity, they take a copper conductor with a cross section of 2.5 mm2 and, depending on the total load on the line, they put protective devices on 16 A or 25 A.

When installing the power outlet, it is necessary to calculate the total voltage while connecting all planned devices
Choosing between cheaper aluminum wiring and more reliable, but expensive, copper, it is better to overpay for reliability. Copper conductors are able to withstand heavy loads, which is especially true for the kitchen. Also, when laying the power cable, do not forget about reliable insulation.
It is important to consider the material of the walls:
- a recess is cut in the concrete and brick walls, a power cable is placed in it, packed in a corrugated pipe made of high-quality plastic;
- for wooden walls, this option will not only be unacceptable, but also extremely dangerous;
- if the walls are sheathed with drywall, then nothing will have to be cut - the wiring is remarkably laid in the voids of the walls;
- Another option is to use a decorative plastic baseboard with cable channels for wiring.
If the latter options are the simplest, then for laying hidden wiring in a concrete wall, you have to work hard - do special channels for the wires. No punch or grinder is indispensable here. You will also need a special nozzle on the punch to form holes for the socket.

Plinths with cable channels can be installed with your own hands even by an inexperienced owner who has never been involved in electrical installation
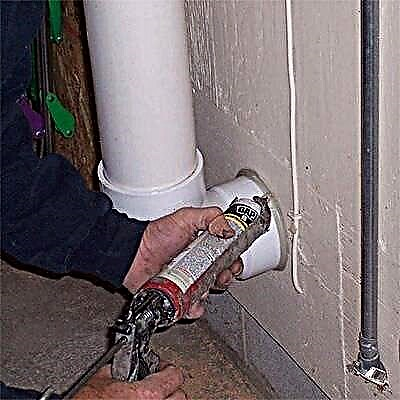
Having completed the gating of the walls, it is necessary to place the supply cable into the recesses obtained, leading it to the places of the planned location of the outlets in the kitchen. Then you have to clean the channel with the wiring from dust. Now carefully seal with a solution of gypsum or alabaster.

The work of making a shtroba in a concrete or brick wall is rather heavy, dusty and will require several hours from an experienced craftsman. It may take a few days for a beginner homeworker to grate
The holes for the sockets are filled with mortar according to the same principle. First, everything is cleaned of debris, pebbles and dust, and the power cable is threaded into the glass itself. For reliable fixation, all the cracks between the socket and the wall are completely filled with a solution of alabaster or gypsum. It remains to wait for complete drying.
These works, if desired and the availability of appropriate tools, can be done on their own. Most often, specialists with considerable experience and skill are invited to lay wiring, leaving for themselves the work of connecting outlets.

When installing the rosettes, you need to carefully remove the excess solution, because it dries very quickly
When the conclusions for the installation of kitchen outlets are ready, you can proceed with installation. To do this, you need to take the tools, and purchased sockets first have to be disassembled by removing the front decorative overlay and separating the mechanism.
Using an indicator screwdriver, you should definitely check if there is voltage in the network - it should not be there! Before installing the outlet, it is important to make sure that all the wires with which to work are de-energized.
After making sure that there is no current, you can proceed to connect the socket mechanism and the wires of the power cable. To do this, remove the protective braid from the cable, strip the edges of each of the 3 wires with a stripper to a distance of 1 cm from the edge, saving them insulation.
The bare wires are alternately connected to the outlet mechanism. Each of the wires plays a role;
- yellow-green is grounding. It connects to the center pin;
- blue (may be blue and white) is a working zero. It is to be connected to the extreme contact of the socket mechanism;
- the third wire can be of any motley color - beige-brown, red, black or just white. This is a phase wire that connects to the second end contact.
The type of connection depends on the outlet used. It can be spring when the connection is made by pressing a special key, or screw, if the wires are fixed with screw clamps between the plates.
Image Gallery
Photo from
We stock up a pair of sockets with a spring clamping device for installation according to a loop circuit. We will connect a mixer, a coffee grinder or a blender to one of them, to a second TV
Turn off the machine installed in front of the kitchen junction box. After the shutdown, we will check with the indicator screwdriver the shutdown
Poke three pieces of wire from one hole to another. If mounting boxes are used, insert the wires through the side hole
We cut the wires so that in both sockets there are 10 -15 cm of each wire. With side cutters we clean 1 cm of insulation from the edge and connect in pairs to the terminals
After making sure that the ground wires are correctly connected and located in the center, we check the reliability of fixation and install the socket mechanism in the socket
The mechanism of the second outlet is connected in exactly the same way to the edges of the wires rolled into the hole, stripped from insulation by an extreme 1 cm
We check how smoothly the outlet mechanisms are installed using the building level or a laser device
We try on the front panel of the twin sockets to the installation site. If everything is fine, fix the frame, as the manufacturer instructed
Step 1: Preparing electrical outlets for electrical work
Step 2: Turn off the voltage in the apartment panel
Step 3: Laying the wires for the loopback connection
Step 4: Prepare the wiring for connecting the paired outlets
Step 5: Installing the Right Socket Mechanism in the Socket
Step 6: Connect the second mechanism to the leaked wires
Step 7: Verify Installation Geometry
Step 8: Installing a protective and decorative frame on top of the mechanisms
After attaching all the wires, you need to attach the socket mechanism tightly to the socket with screws. Then you should check with a level whether everything is exactly centered. If everything is in order, you can screw on the front of the outlet and check the quality of their work with a bulb or other serviceable device. Previously, do not forget to turn on the current on this line.
The following selection will familiarize you with the features of connecting electrical fittings with screw clamps:
Image Gallery
Photo from
Step 1: Installing ABB Niessen Zenit Modular Socket Supports
Step 2: Connect the wiring to the outlet mechanism
Step 3: Connect the second outlet using a loop circuit
Step 4: Locking Modular Socket Mechanisms
If the light comes on, the installation of the kitchen outlet has been completed successfully. Otherwise, you have to disassemble everything and reconnect, not forgetting to disconnect the line before starting work.
Mortise models of sockets can also be installed with your own hands. To do this, carefully cut out the holes in the countertop or cabinet using special tools. In the accompanying instructions, the manufacturer indicates in detail how to properly connect and use his product.

When installing the front part of the outlet, it is important not to overdo it when tightening the screws so that nothing bursts
You can also use the services of specialists to perform all installation work - it depends on the desire, skills and available tools from the owner of the house / apartment.
Often, for powerful consumers of foreign production, a socket with a Euro connector is required. The following is a sequence of work to install it:
Image Gallery
Photo from
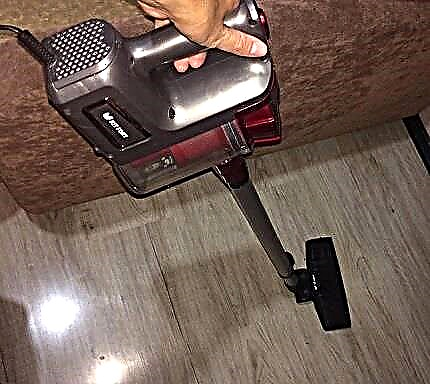
Step 1: Purchase an outlet for connecting the hob
Step 2: Preparing the device for electrical work
Step 3: Drilling holes on the wall for installing the caliper
Step 4: Install the metal plate on the wall
Step 5: Attaching the Socket Mechanism to the Caliper
Step 6: The specifics of connecting the socket mechanisms to each other
Step 7: Connect the device to a separate power line
Step 8: Installing the Combo Socket Housing
The main mistakes in the placement of outlets
The importance of the correct location and connection of kitchen outlets is difficult to overestimate. Any, even the most original kitchen, is first of all obliged to be safe. It is not uncommon for owners to underestimate this requirement. This happens mainly due to inexperience, because they do not do a full repair of the room every month.
Among the mistakes made when placing kitchen outlets, there are both frankly rude and insignificant. If minor flaws bring during operation only inconvenience and a certain discomfort, then serious flaws can cause many troubles.

Improper wiring may cause severe fire due to short circuit.
The worst thing is neglect of safety rules. This is when the wiring is laid incorrectly, the material of the walls and the desired insulation option in a particular case are not taken into account. Such negligence is fraught with dire consequences - with a short circuit from the whole house in a matter of minutes, only ashes will remain.
The second serious violation is when all wiring accessories are powered from one power cable. This layout of the outlets in the kitchen does not hold water, because the line is simply not able to withstand the voltage.
As a result, a completely non-functional room. You should always make sure that only one powerful or 2-3 low-power device is turned on. This is unacceptable for the kitchen.
The third mistake is if a separate line, coming from the shield, was not allocated for the electric stove. This powerful consumer of electric current will work efficiently only if it is connected correctly.
Fourth, all sockets hidden under the sink must have an appropriate degree of protection against moisture - at least IP44. Groups of electric points located in the free access zone of children must be selected with protective curtains.

Incorrectly located outlets should be immediately transferred to places more suitable for them (+)
Fifthly, for all devices working with water, for example, a dishwasher or washing machine, it is important to make a separate supply line. It must be equipped with a residual current device, and it is advisable to take installed sockets with grounding. In the event of a short circuit, these measures will help protect the home from harm by disconnecting the line.
Minor errors in the placement of kitchen outlets include the inconvenient location of some of their groups. It’s also bad when they forgot to provide for a couple of spare points, for example, for a phone or laptop charger.

Sockets harmoniously matched to the general style of the room will not cause irritation to the hostess
Another unpleasant drawback is when the color and shape of the housing of the installed outlets is knocked out of the overall design of the room. This usually happens if the owners change the general concept of the kitchen many times. Having bought the necessary materials, they suddenly decide to change the color scheme or order other furniture, forgetting about the already mounted outlets.
Video # 1. What is the best way to arrange kitchen outlets, as well as, emphasis on the main mistakes in their placement:
Video # 2. Features of electrical wiring in the kitchen and places of sockets:
Video # 3. Visual video about connecting the built-in outlet block:
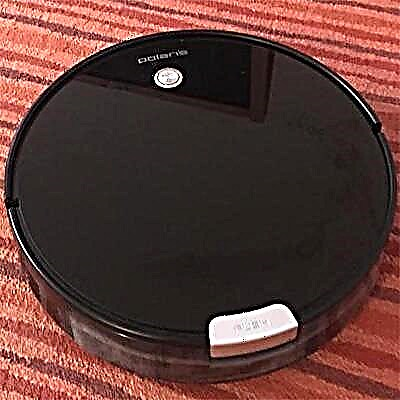
Video # 4. Overview of a retractable outlet plugged into a countertop:
Given the basic recommendations for the placement of kitchen outlets, you can design the most convenient workspace, rest area and meal. A cozy kitchen where it is comfortable not only to cook, but also to gather for a family dinner, can become one of the most favorite places in the house. It's great when the right things have taken their place and are always at hand.
We are waiting for your stories about personal experience in choosing a place and installing outlets in the kitchen. Please comment in the block located under the text of the article. Here you can ask questions and point out flaws if they were discovered during the familiarization with the material.